 First the sketch. I did this sketch in 30 to 40 minutes using pencil and a ball point pen. I probably should have spent a little more time. You will see how I had to make some corrections once I got it scanned and loaded into Photoshop. The anatomy of the front arm needed some adjustment and the number on the shoulder was too high and too small. Traditionally you would erase and redraw. Digitally you can simple cut and move - even rotate and re-size. It is also easy to change the composition - which I did.
 Create 3 layers. The sketch in on the middle layer. The top layer is a tone of your choosing (Umber in my example) and you dial down the opacity to 50-70% until you can see the sketch and have a good overall mid-tone. The sketch layer itself is set on "Multiply" which allows you to paint on the layer below without interfering with the sketch. Here I block in the dark tones I see in my reference using the same umber color.
 Next - I add a layer above all layers and set it to "Soft Light." Then using white only I set out to block in the lighter tones I see in my reference photo. Squinting to increase the contrast of your reference will help you see the lights and darks better (learned that from Seiler too).
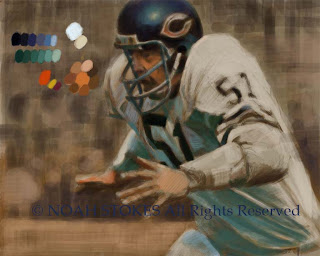
 First color layer. I made a palette on a layer (just like you would if working with traditional paint) and used it to start laying in color. Concentrating on getting the darks and lights correct. I also begin to play around with the background so it will tie into the colors being used in the figure.
1 comment:
Thanks, Noah, for going to all of the trouble to lay this information out. I have found it to be VERY informative and I hope you have the time to add more posts as you work towards completion of this project.
Post a Comment